Recipe: Lasagne

Français

IMG_4051

This lasagne recipe is fairly simple to put together. It’s a bit more time-consuming to prepare than a regular pasta dish of course, but it’s well worth the extra time and energy as far as I’m concerned! Feel free to swap out the veggies I used for your favourite ones, omit the tofu if you’re avoiding soy and use gluten-free lasagne noodles if needed.

Homemade Lasagne
Vegan | Nut-free | Gluten-free option

Serves 4

Ingredients:

  • 9 whole wheat lasagne noodles (or brown rice/gluten-free noodles, if needed)
  • 2 small cans (15 oz) tomato sauce
  • 1 package organic firm tofu (or Yves Veggie Ground Round)
  • 2 tsp dried basil
  • 2 tsp dried oregano
  • 1/2 tsp chili powder
  • 1 tbsp grapeseed oil
  • 1 medium onion, chopped
  • 2 cloves minced garlic
  • 3 cups chopped veggies (I used carrots, broccoli, cauliflower, kale and rainbow chard)
  • Salt and pepper
  • 1 cup grated vegan cheese (I used Daiya Cheddar Style Shreds so the grating wasn’t necessary)

Directions:

  1. Fill a large pot with water and bring to a boil on the stove. Add the noodles and cook until they are al dente, then rinse them in cold water. Set aside.
  2. In a medium-sized bowl, crumble the block of tofu into small pieces (or if using the Ground Round, empty that into the bowl instead). Reserve a half cup of the tomato sauce, then pour the rest of it over the tofu.
  3. Add the basil and oregano, as well as salt and pepper to taste, into the tofu/tomato sauce mixture. Stir and set aside. IMG_4124
  4. Heat the grapeseed oil in a large saucepan. Add the chopped onion and a dash of salt and sauté on medium for about 3 minutes. Add the minced garlic and cook for another 2-3 minutes, until the onions are translucent.
  5. Put a couple of tablespoons of water in the pan and slowly add in your veggies, starting with whatever will take the longest to soften. I started by adding the carrots and letting them cook for about 2 minutes, then added the broccoli and cauliflower and let the mixture cook for another couple of minutes, and finally added the kale and chard.
    IMG_4036
  6. When the veggies have started to become slightly tender, remove the pan from the heat. Stir in the chili powder and a bit of salt and pepper. 
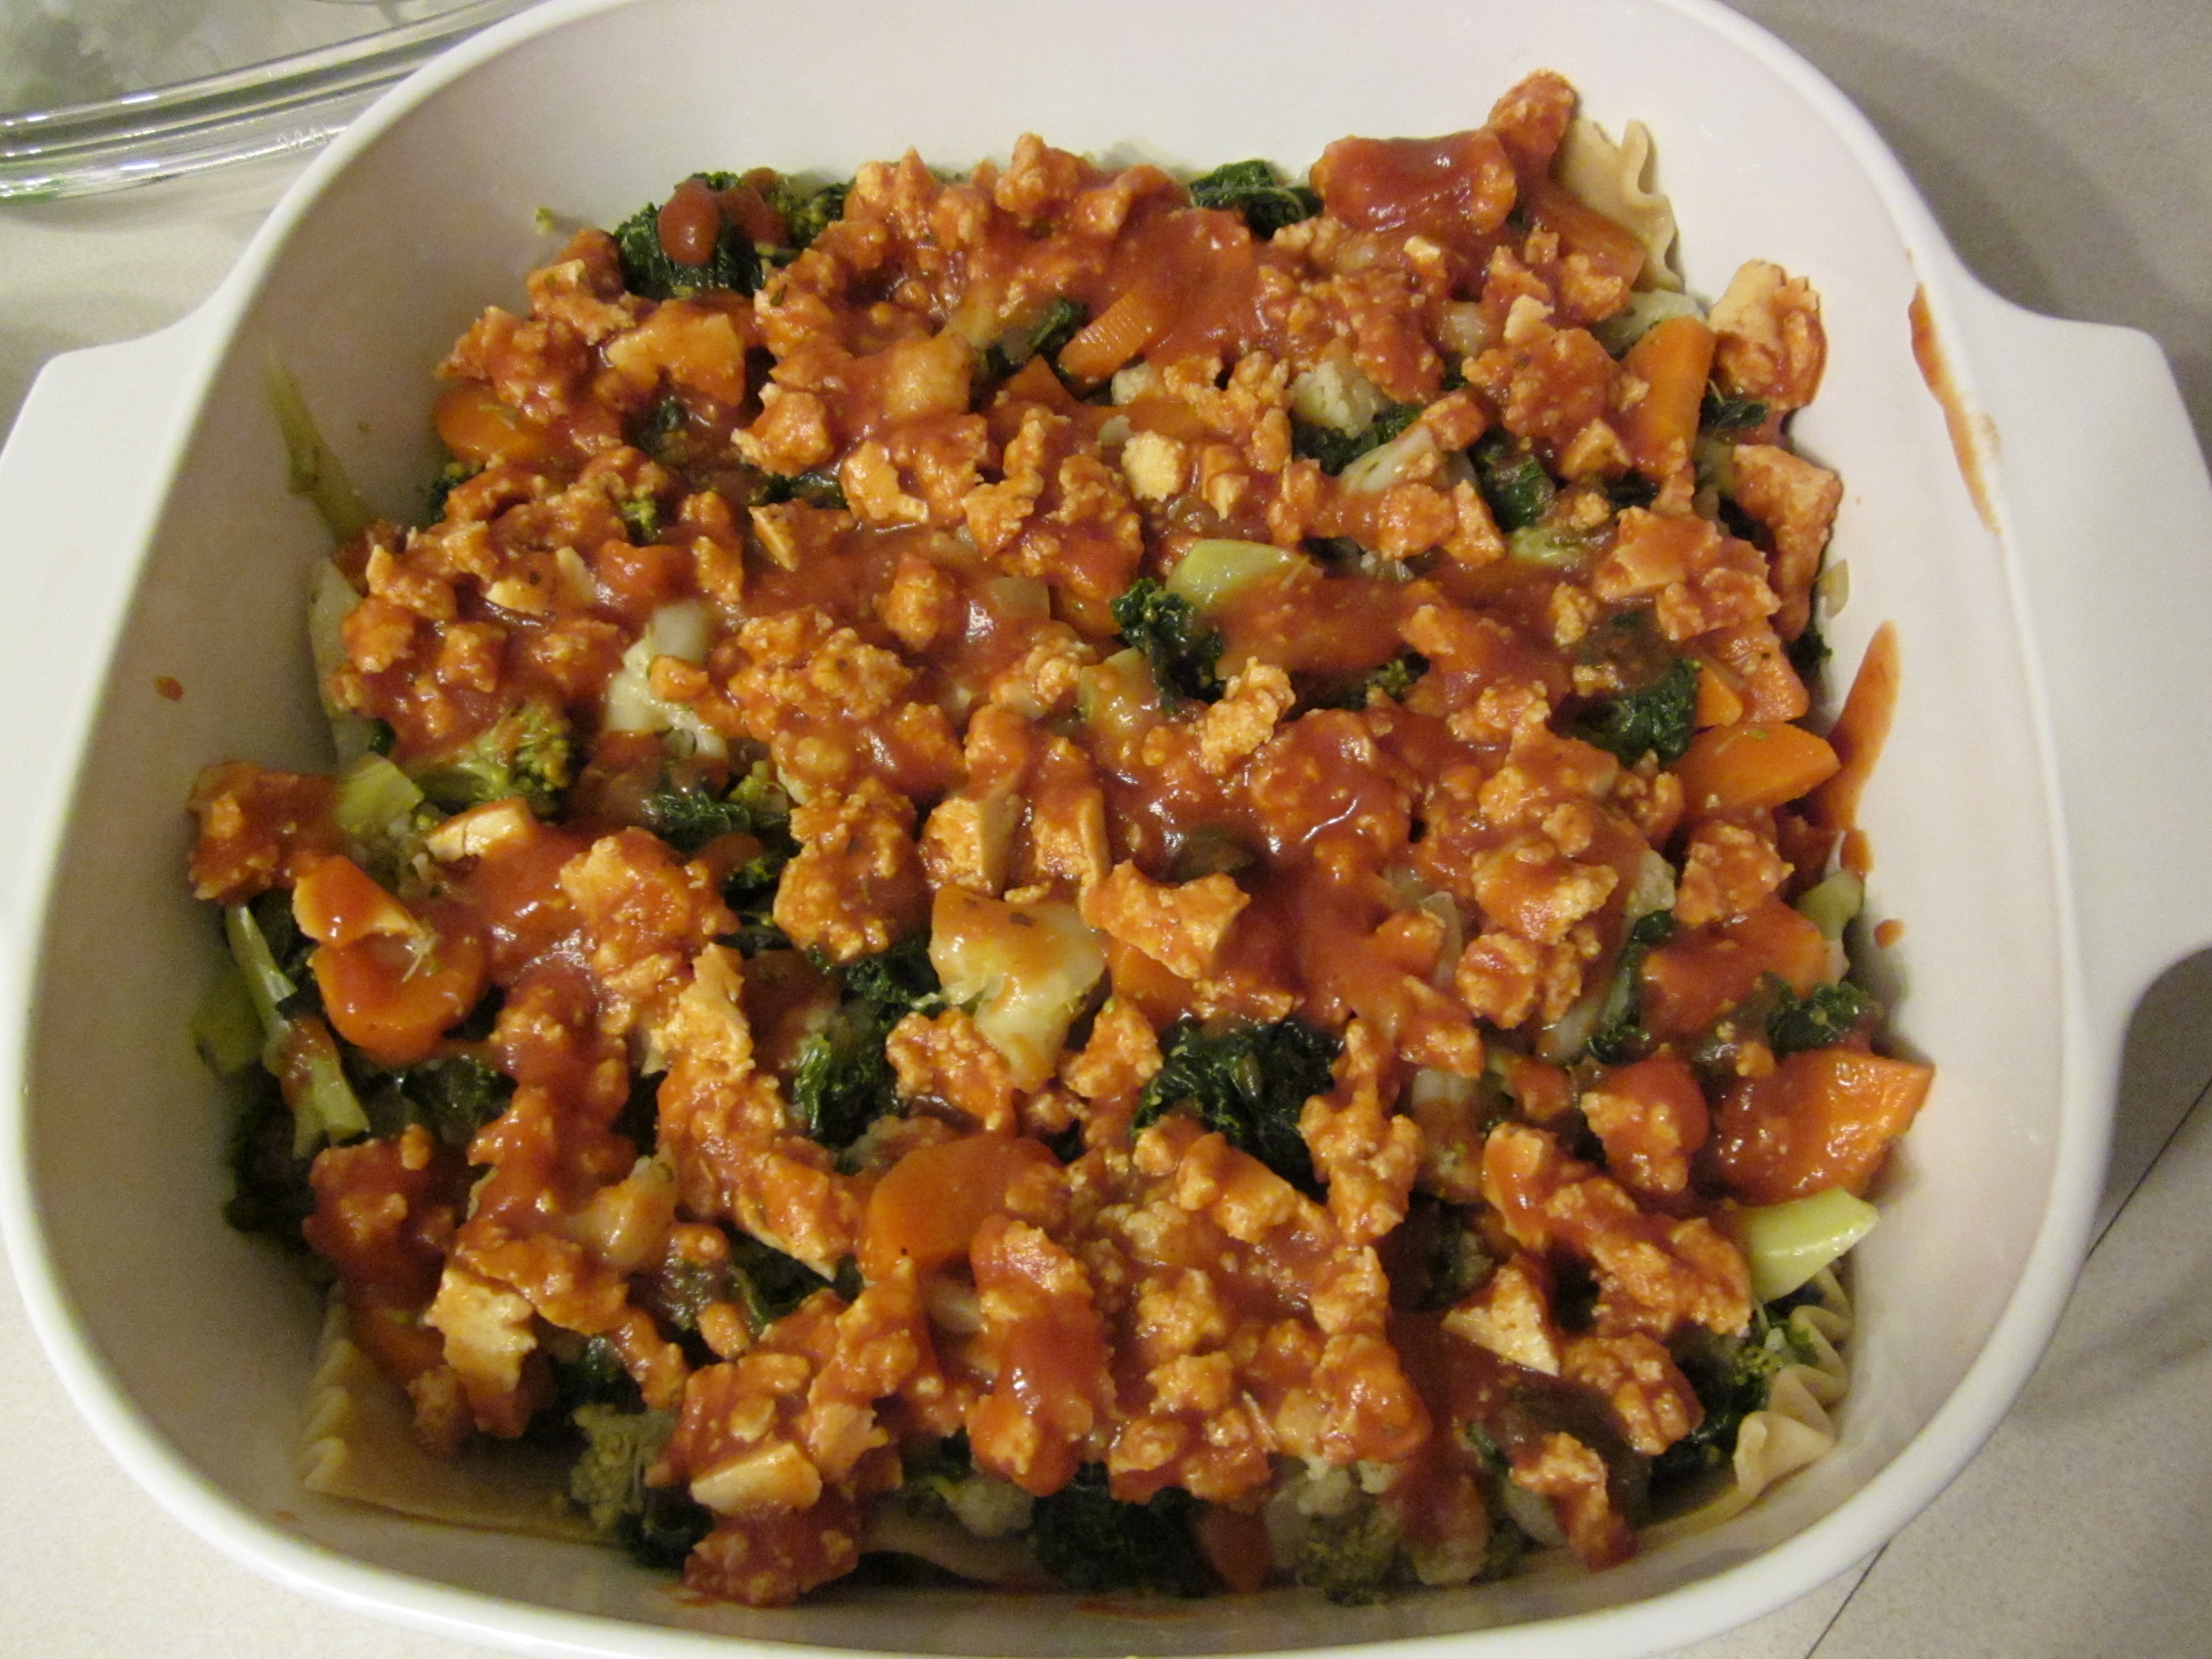
  7. Prepare your casserole dish by spreading about 1/4 cup of the reserved tomato sauce around the bottom of the dish. Layer 3 of the cooked lasagne noodles lengthwise overtop of the tomato sauce.
    IMG_4123
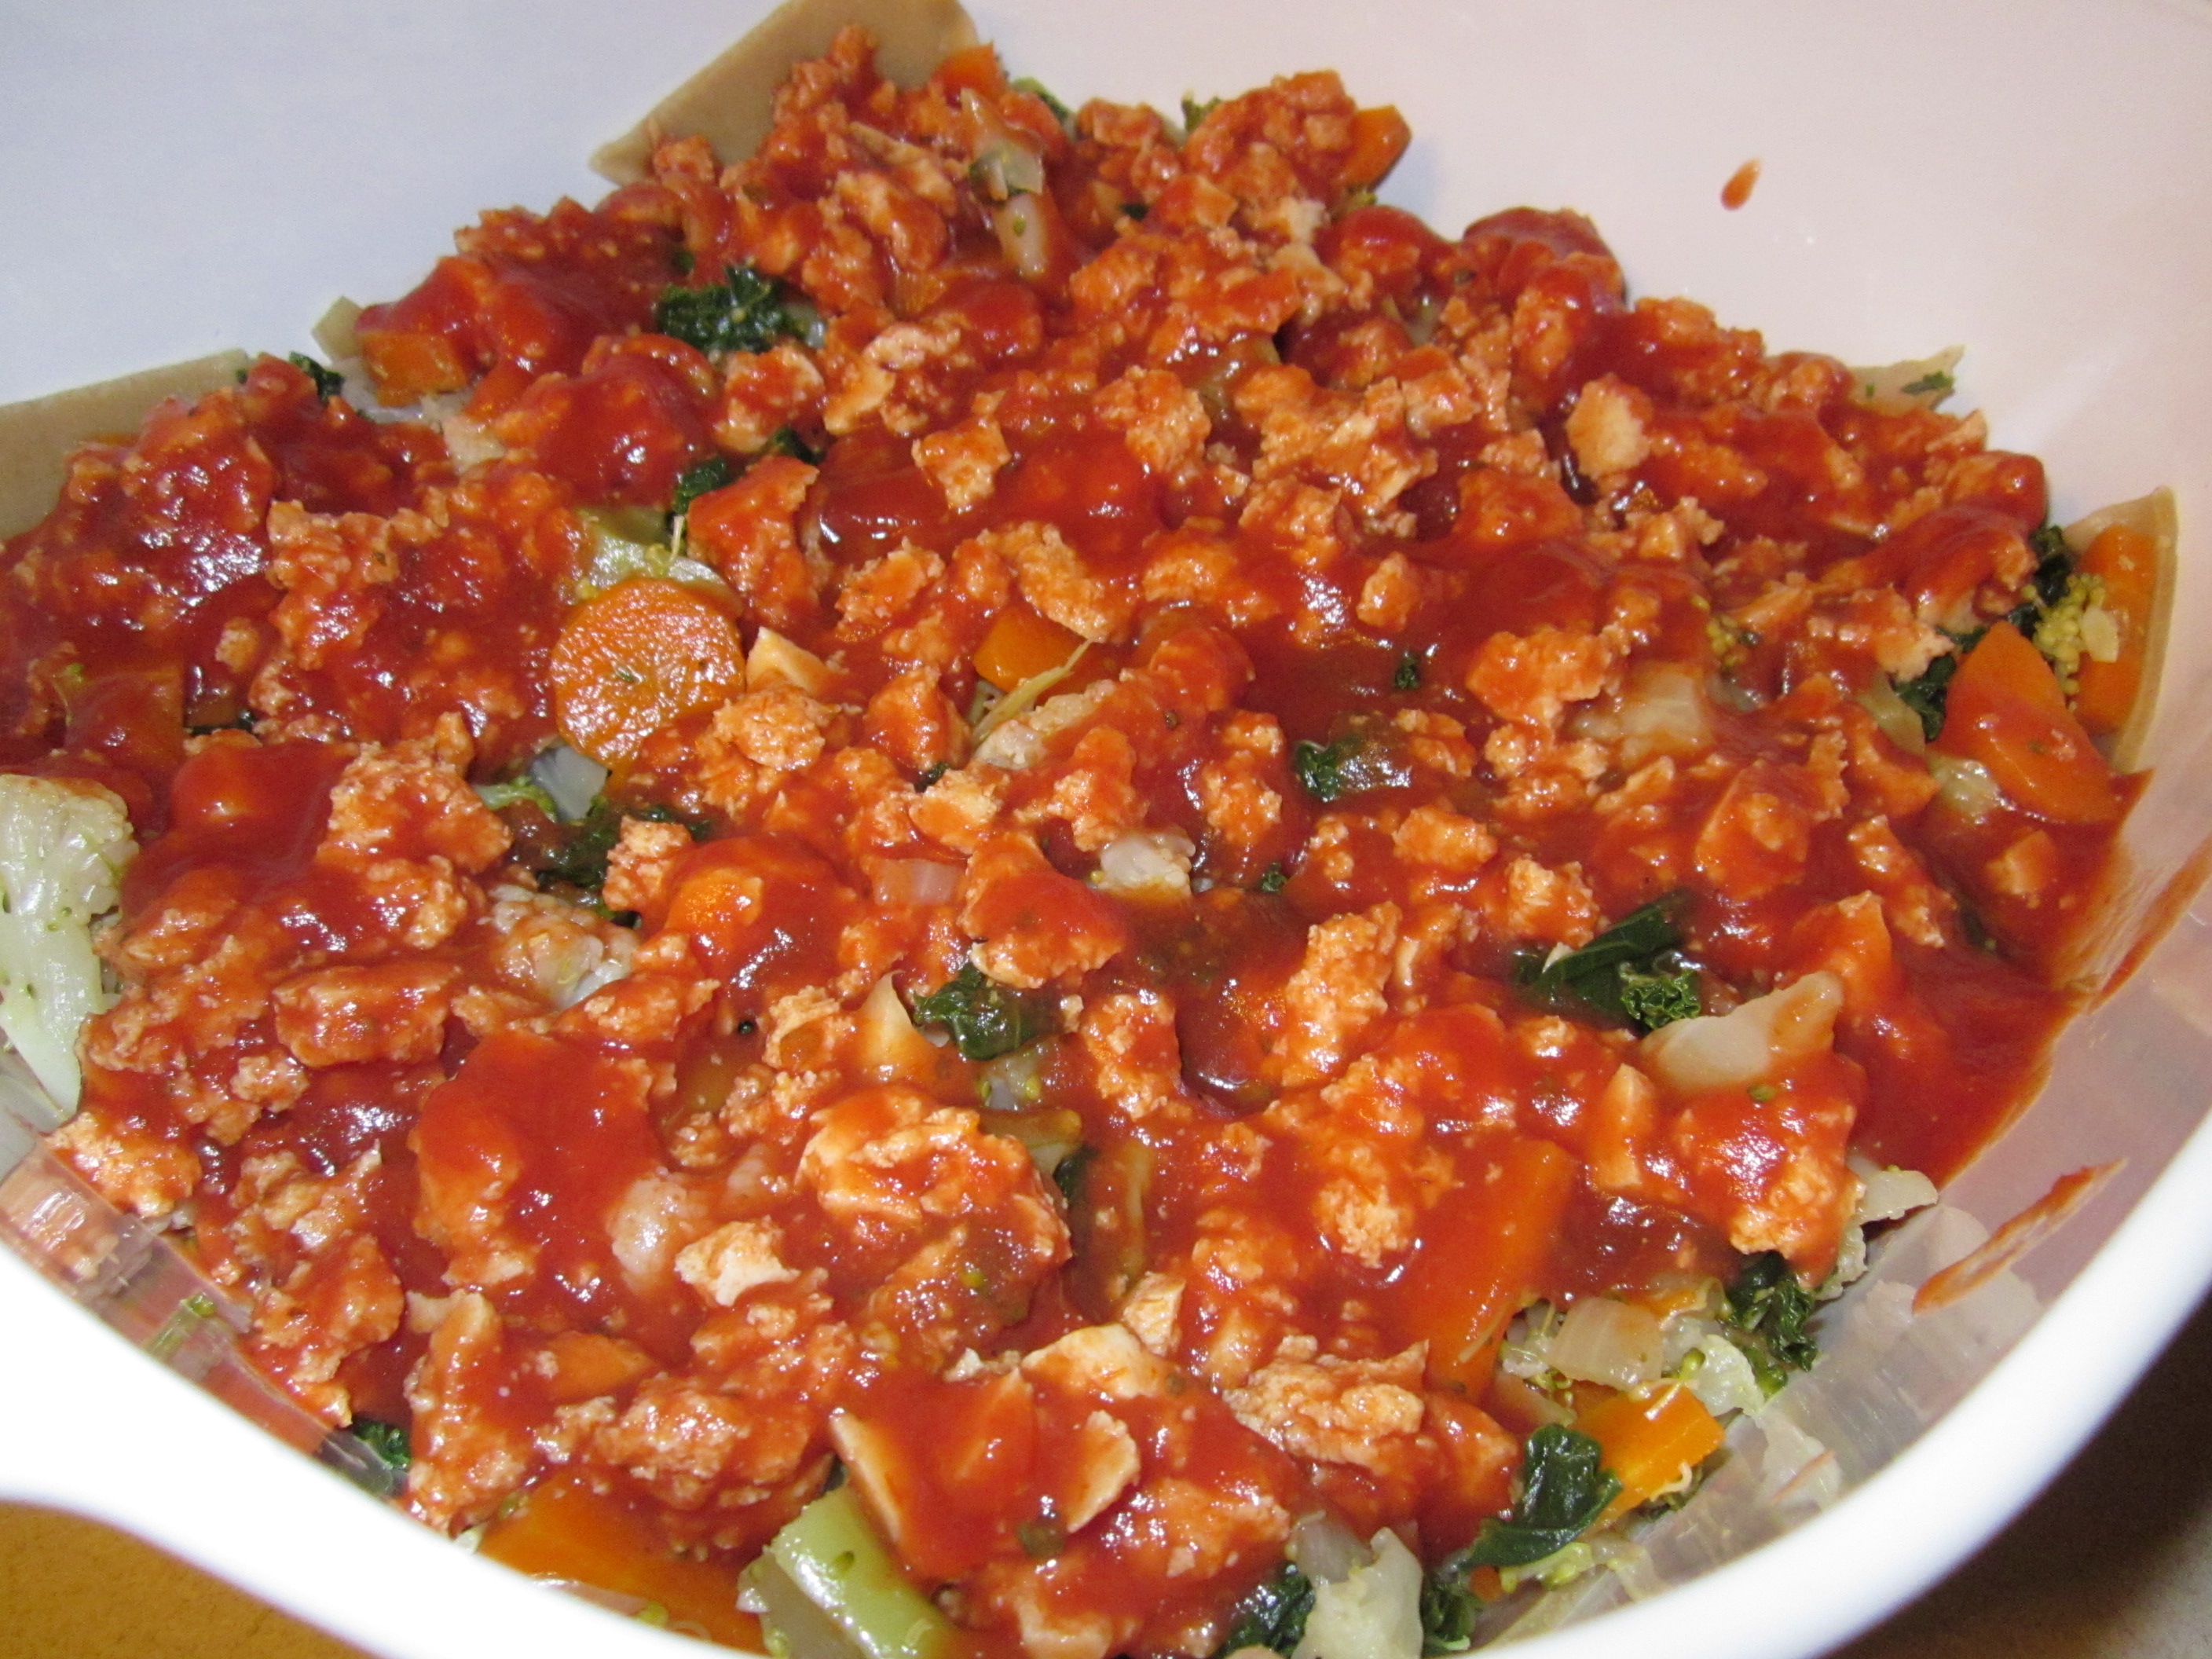
  8. Next, spoon half of the onion and veggie mixture overtop of the noodles, spreading the veggies around to create an even layer.
    IMG_4125
  9. Pour half of the tofu/tomato sauce mixture over the veggies, distributing it as evenly as possible.
    IMG_4127
    IMG_4129
  10. Lay 3 more of the cooked noodles lengthwise over the veggie layer. Top with the remaining veggies and the rest of the tofu/tomato sauce mixture, spreading both mixtures out as needed.
    IMG_4131
  11. Lay down the last 3 noodles and cover with the 1/4 cup of tomato sauce you still have set aside. Sprinkle the cheese over the tomato sauce.
    IMG_4040
  12. Cover the casserole dish with a layer of foil, and poke a few holes in the top so some of the steam can escape. Bake at 375 F for 40 minutes, then uncover and bake for another 5 minutes or so until the cheese starts to brown slightly.
    IMG_4050
  13. Cut into squares and enjoy, perhaps with some homemade garlic bread and a side salad.

Tips: For a subtle “kick” to the lasagne, try topping it with Daiya Pepperjack Style Shreds and adding a bit of cayenne pepper to the tomato sauce. For a bit of extra richness, try making a simple cashew ricotta and spreading it on top of the first two layers of noodles, before you add the veggies and tofu/tomato sauce mixture.

Vegan pad thai made easy

Ottawa used to have a wonderful vegetarian Thai restaurant called Sacred Garden. Sacred Garden also happened to be about a 20 minute walk from my house, which made it both equal parts wonderful and dangerous. At Sacred Garden most dishes could be made vegan, and none contained the dreaded fish sauce that permeates Thai cuisine. They even stated right on the menu that they didn’t use it. Every trip to Sacred Garden guaranteed a fabulous mouth party. I usually stuck to the same entrees though: pad thai, panang curry, and pad ki mow. Their spring rolls brought me to tears, and induced fierce and uncontrollable cravings.

One of many visits to Sacred Garden.
I have many fond memories of Sacred Garden. I probably took just about every friend I have there at one time or another- omnivore or not. The little Thai lady who ran it knew me by name, and when I called in a take out order she always remembered, “no egg, no mushrooms” before I even had to say it. But I was out for a run in December of 2009, and when I ran past Sacred Garden I saw the sign that nobody wants to see on their favorite restaurant: CLOSED FOR BUSINESS.

I was pretty depressed for at least a week. But the repercussions have lasted long beyond that. I try not to think about Sacred Garden too often, because when I do I become despondent. We had such a good thing here… to have lost it seems beyond comprehension. Sacred Garden’s closing left a huge void in the Ottawa vegan food scene that has yet to be filled, although thank goodness for some of the fantastic eateries that we do have. I love each and every veg restaurant in this city, but none of them do Thai like Sacred Garden. Consequently, I’ve set about trying to emulate the delicious flavours that once left my mouth roaring with delight. Unfortunately, this effort has been a dismal failure.

However, there have been some good things. For one, I discovered Taste of Thai prepared pad thai sauce, and lo and behold… it’s vegan! Now, normally I prefer to make things from scratch, but I have tried, over and over, to make an adequate from-scratch pad thai and I have yet to make one that is as good as this one. It’s not perfect, it’s certainly not Sacred Garden calibre, but it gets the job done. I even made it for a co-worker and her husband, and she reported back that it was very similar to the “real” thing. Taste of Thai also makes a range of curry pastes and a spicy peanut sauce that I will blog about at a later date. They’re also not difficult to find: I’ve purchased them at Loblaws, Food Basics, and Metro.

So when I want pad thai here’s what I do (serves 3):

– Soak half a package of rice stick noodles in hot water
– In a frying pan, saute (just a bit) your choice of vegetables (lots of those). My stand-bys are red pepper, zucchini, and broccoli. I used julienned carrots and onions as well this time.
– If you’re feeling protein deficient (ha!) toss in some tofu cubes, or some sort of mock meat. I personally love it with Nelakee faux shrimp and President’s Choice meatless chicken breast.
– Add the noodles and the sauce packet. Toss to mix/warm. Serve.

Here’s the final product:

Homemade Pad Thai with faux chicken and shrimp.

Mock meats of Ottawa’s Chinatown, Part 2

From Yves Veggie Cuisine to Tofurky to Gardein to Sol to the offerings in the President’s Choice Blue Menu line, the variety of mock meats in supermarkets has exploded in recent years. Ottawa’s Chinatown is a fantastic resource for lovers of mock meats. This is the second in a series of posts to introduce readers to the treasures they can find in Chinatown and meals that can be made with them.

This time, we return to Phuoc Loi on Somerset to seek out a truly amazing invention, mushroom chicken.

These are two styles of packaging you might encounter. They have identical stuff inside.

[Update and a caution to vegans: Yesterday I noticed a sticker I had never seen before on a package of mushroom chicken: “ovo-vegetarian”. I phoned the distributor, Chialee, and they told me that there are two kinds of mushroom chicken, one containing egg and one not. The eggless ones should be stickered “vegan”.]

What can you do with it? 

You can take it out of the package, shake some salt onto it if you want, and eat it. Warning: it’s addictive! (Don’t thaw it in the microwave though. For some reason, that turns it gross.)

It’s great in stir-fries, of course. And it makes a good chicken salad, chopped up and mixed with celery and red onion and Vegenaise (although I prefer the President’s Choice mock chicken in chicken salad sandwiches).

A favourite cold-winter-day meal in our house is chicken soup made by following this soup recipe from VegWeb, minus the dumplings, plus mushroom chicken. Cut up the mock chicken, lightly brown it in a frying pan, and add to the soup just before serving.

The recipe I am going to highlight today, however, is one you can serve when you have friends over to watch sports. Yes, get ready for vegan chicken wings.

Ingredients:

  • 1 bag of mushroom chicken
  • Your favourite barbecue sauce

Toss the mushroom chicken with barbecue sauce to coat it. Spread out the pieces on a baking sheet. Bake at 400°F for 12-15 minutes, or until the wings begin to blacken at the edges.

Vegan chicken wings before baking

A plate of vegan chicken wings

On a sad note, since my last post the sign on New 168 Market has changed from “Store Renovations” to “For Lease”. Phuoc Loi and New 168 Market have been my main sources of mock meats since I moved to Ottawa, so it’s a pity to see New 168 go. However, there are other nearby sources of these products. If you visit Montréal, drop by Paradis Végétarien Chi-Ming at 4381 Saint-Denis Street. They carry all these products, and some of them in bulk, so you can bring home extra for your friends. You can also order some of these products online from Viva Vegan. (They ship in insulated cold packs so that the mock meat stays good in the mail.)

Vegan food takes over the family holiday meal

By Pamela

Last week my uncle facebooked me to say he was planning an impromptu family gathering at his home in Napanee. This is a rare occurrence for my family. We’re close in some ways (we’re mostly all connected by facebook, and stay in touch) and we all look pretty much the same, but large family events are not common. So my partner and I decided to make the trip to Napanee and back to participate.

My uncle is a lover of kale, smoothies and carrot juice, but is otherwise mostly uninitiated in the ways of vegan cuisine. He and the rest of my family, however, are very open to trying new things, and were enthused when I told them I would bring along a few dishes to share with everyone. Of course, then the pressure’s on. My food had to be not just passable, but fabulous. There was no margin for error. And how would I decide what to bring, from my extensive repertoire of vegan wonderfulness?

The apple crisp BEFORE part of the crisp was stolen by squirrels.
The choice of dessert was made easy with the purchase of a 10 pound bag of apples. Apple crisp it would be! My partner says I make the best apple crisp ever, so it’s usually a good bet. So I prepared that first, and set it outside to cool. Next, I prepared miso gravy, which is super yummy and light, and also excellent on poutine. Imagine my amusement when I went out to put the miso gravy in the cooling zone, and discovered that about 1/4 of the “crisp” on the apple crisp was missing! It’s a good thing that I think squirrels are adorable.

I rectified the situation by patching it up with some “crisp” remaining from a leftover piece of apple crisp made for a Sunday event with the in-laws. My family’s pretty “salt of the earth” so I don’t think they minded too much that they’d shared dessert with a hungry squirrel. Then, I spoke on the phone to my uncle’s girlfriend, who was organizing the party. She told me she was disappointed that she missed out on trying my mac & cheez the last time I’d visited. So, I made an executive decision to make mac & cheez as well. If a non-vegan wants to try vegan mac & cheez, then try it they shall!

Neil's Ham & Cheez biscuits. Nom!
Next, I set upon making Neil’s ham and cheez biscuits which I had delighted in at a potluck past. I started small, making one batch first just to ensure I had the magic touch. They. Were. Amazing. So, I made a second batch. Forty-eight little ham and cheez biscuits! Although there were much fewer than that by the time we arrived at my uncle’s house. I blame the squirrels.

The last frontier of the day was preparing cheez kale mashed potatoes. First, I had to peel five pounds of potatoes. My uncle had expressed a great deal of concern about having enough potatoes, so I figured no less than that would do. The cheez-ness was attained through nutritional yeast, unsweetened almond milk, garlic powder, salt and pepper, and earth balance. There is no recipe, I just made it up as I went along. Boil the potatoes (and blanche the kale), mash them up until your muscles are sore, and throw in random amounts of the aforementioned ingredients.

A couple of recipes:

APPLE CRISP

Peel and slice (1/8 to 1/4 inch slices) about seven MacIntosh apples. Put them in an 8 x 8 glass baking thing. Sprinkle with lemon juice.

In a medium sized bowl, cream half a cup of vegan margarine (I use Earth Balance or Becel Vegan) with 3/4 cup of brown sugar. Add 1/2 cup of flour (I use spelt). Add 1 tsp. cinnamon. Mix in 1 cup of oats.

Sprinkle the crisp on top and cook at 350F for about 30-40 minutes.

MISO GRAVY

Melt about 1/4 cup vegan margarine in a saucepan. Whisk in about the same amount of flour. Add about two cups of veggie broth, and 1/4 cup of nutritional yeast. Whisk in about 2 TB miso (or to taste). Whisk pretty constantly until it has thickened. Add pepper and paprika to taste.

The family in a post-meal food coma.
We came home with some leftovers but all in all my contributions went over very well. My uncle facebooked me this morning to say, “thankx for the food Pam. Everyone loved your food.”

Tried and true tofu turkey

By Edelweiss

Although I’ve been a vegetarian for more than 25 years, my mom and dad have still not ventured into cooking veg*an holiday food. So every year, I take a tofu ‘turkey’ to Montreal, frozen, and heat it up when they’re cooking their meal. It travels well, and it’s nutritious, tasty and festive.

You’ll probably have to spend some time at the store getting all the spices and other ingredients, but assembling the ‘turkey’ doesn’t take long. It needs to be made over three days, and takes about 15 minutes each day.

Enjoy! Serves about four people. Double the recipe to serve eight.

Homemade tofu ‘turkey’

Stuffing

  • 1 tablespoon oil
  • 1/2 large onion, chopped finely
  • 2/3 cup celery, diced
  • 1/2 cup mushrooms, chopped finely
  • 2 cloves garlic, minced
  • 1 teaspoon sage
  • 1 teaspoon marjoram
  • 1 teaspoon thyme
  • 1 teaspoon savory
  • 1/2 teaspoon rosemary
  • 1 teaspoon celery seed
  • salt and pepper
  • 2 tablespoons soy sauce
  • 1 1/12 cups vegan herb stuffing (or use bread crumbs: crumble half a baguette that’s a few days old and dry)

Saute the onion, celery and mushrooms. When soft, add the garlic and spices. Cook for five minutes. Add herb stuffing or breadcrumbs, and mix well. When cool, roll into a ball, compress, cover with plastic film, and put in freezer until frozen.

The “turkey”

  • 1 pound firm tofu
  • 1 pound silken tofu
  • 1 teaspoon sage
  • 1/2 teaspoon marjoram
  • 1/2 teaspoon thyme
  • 1/2 teaspoon savory
  • 1/4 teaspoon rosemary

Crumble firm tofu and add silken tofu: mix with hands. Add spices. Put a couple of 20-inch pieces of plastic film in a cross on a plate, and put half of tofu mix on the plastic.

Take stuffing from freezer, remove plastic film, and put on top of tofu mix on plastic. Pour rest of tofu mix over the stuffing ball, so it covers the stuffing completely. Make into a ball, press down on the ball so there’s a base (so it doesn’t roll around), wrap it in the plastic and put back in the freezer until frozen.

Basting Mixture

  • 1/4 cup oil
  • 1 teaspoon soy sauce
  • 1/2 tablespoon of vegetable base
  • 1 tablespoon orange juice or syrup
  • 1/4 teaspoon dry mustard

Mix, and put into a little glass container for traveling.

Cooking: Heat oven to 375 degrees. Thaw and put tofu turkey into baking pan, and pour half of basting mixture over it. Cook for 30 minutes. Add rest of basting mixture and cook for another 15 minutes.

Gravy: I use a packaged vegan mix. You can also try a gravy recipe like this one: http://vegetarian.about.com/od/saucesdipsspreads/r/misogracy.htm

Cranberry sauce: I make my own, but you can (of course!) buy it ready-made.

Happy holidays!

Edelweiss


Cinnamon bun madness

I’ve had a mild obsession with sticky buns (or cinnamon buns) for as long as I can remember. I recall being a tween at the shopping mall and lining up for what felt like hours to order one at Saint Cinnamon. I don’t think that franchise exists anymore, and even if it did, its products are not vegan.

So of course, that gives people the impression that cinnamon buns can’t be vegan, and nothing could be further from the truth. In fact, the most delicious cinnamon buns I’ve ever had are ones I’ve made myself. But they’re a fair bit of effort, and frankly, it’s dangerous to have a dozen cinnamon buns in the house, so these days for an occasional treat I buy one at Auntie Loo’s. (507 Bronson Avenue, Ph# 613-238-ALOO)

Auntie Loo knows that people love cinnamon buns, which is why she’s concocted a tempting Christmas treat. It’s almost unfair, really. 😉 She’s offering Auntie Loo’s Christmas Morning Gift Pack. For $20, you get 10 pieces- six of her signature gooey cinnamon buns and four of her scones. You buy one, keep the treats in your freezer until the day before, thaw in the fridge for at least 12 hours and then bake for 10 to 15 minutes for your own special warm and fresh Christmas morning treats.

Call the bakery to order one soon, and they can be picked up until Dec. 24 at noon. To find out about all of Auntie Loo’s specials and treats, visit http://www.auntieloostreats.ca .

And if you’re feeling super enterprising, or miss Auntie Loo’s deadline, here is the cinnamon bun recipe that I use.

ZOMG Cinnamon Buns

Rolls:
3/4 C unsweetened soy milk
1/4 C vegan margarine, softened
3 1/4 C all-purpose flour
1 (.25 ounce) package instant yeast
1/4 C white sugar
1/2 tsp salt
1/4 C plus 2 TBS water

Filling:
1 C brown sugar, packed
1 TBS ground cinnamon
1/2 C margarine, softened

Glaze:
2 tsp syrup (corn or maple)
2 tsp vanilla extract
2 C icing sugar
4 TBS unsweetened soy milk

Heat the soy milk in a small saucepan until it bubbles, then remove from heat. Mix in margarine; stir until melted. Let cool until lukewarm.

In a large mixing bowl combine 2 1/4 cup flour, yeast, sugar and salt; mix well. Add water and the soy milk/margarine mixture; beat well. Add the remaining flour, 1/2 cup at a time, stirring well after each addition. When the dough has just pulled together, turn it out onto a lightly floured surface and knead until smooth, about five minutes

Cover the dough with a damp cloth and let rest for 10 minutes. Meanwhile, in a small bowl, mix together brown sugar, cinnamon, softened margarine.

Roll out dough into a 12 x 9 inch rectangle. Spread dough with margarine/sugar mixture. Roll it up into a 12 inch long log.

Cut into 12 equal sized rolls and place cut side up in two lightly greased round pans. There will probably be extra marg/sugar mixture so apply it to tops and bottoms of buns.

Turn on oven to about 200 F. Put buns in, and then in five minutes turn it off. Let them continue to rise for another 15 to 20 minutes or so, until bigger and poofier.

Switch oven to 375 degrees F (190 degrees C). Bake in the preheated oven for 20 minutes, or until browned. Undercooking is better than overcooking, so be vigilant.

Combine all the ingredients for the glaze in a small bowl and mix until smooth. Let rolls cool a few minutes then drizzle with glaze.

Milk: the perfect food — for a calf!

Natasha Kyssa.
By Natasha Kyssa
www.simplyraw.ca

We’ve all seen the ad campaigns on television, billboards and in magazines. In fact, just about every editorial publication has an entire page dedicated to celebrities wearing the white moustache and endorsing cow’s milk as the “perfect food” for humans. The dairy industry is spending billions of dollars on marketing campaigns to coerce the public into believing that “milk does a body good.” This dedicated advertising campaign has been so successful that most people view milk commercials as more of a public service announcement than a shrewd attempt for corporate profit.

Milk’s main selling point is calcium, and North Americans are encouraged to drink several glasses of milk every day in order to prevent osteoporosis. No wonder we are such a dairy obsessed culture! We consume the highest amount of dairy products worldwide – ingesting the creamy white stuff multiple times a day – on its own, with cereal, cookies, in coffee, milkshakes – we even warm it up in order to get a good night’s sleep! But did you know that North America also has the highest incidence of osteoporosis?

The truth is, contrary to what the glossy ads proclaim, there are many studies indicating that drinking cow’s milk actually increases the risk osteoporosis. “Dairy products contain sodium and animal protein, both of which encourage calcium losses.” writes Dr. Neal Barnard, MD, and President of The Physicians Committee for Responsible Medicine.All animal products create an acidic environment in the body. Your body must neutralize this acid by leaching calcium – an alkaline mineral – from the bones. Eventually, this calcium is flushed from the body, which, over years, can result in osteoporosis. “It’s time [milk] ads stop pretending there are no health risks from drinking milk,” Dr. Bernard goes on to say.

What the ad campaign conveniently fails to tell us is that all dairy products (including organic milk, yogurt and kefir!) are loaded with high levels of cholesterol, and “skim” or not, saturated fat – contributing significantly to cardiovascular disease. Studies are also linking the consumption of casein – a protein present in dairy – to allergies, asthma, bloating, IBS, stomach pain, migraines, tumors, as well as breast, colon, ovarian and prostate cancers.

As if this isn’t bad enough, cows are injected with artificial growth hormones and forced to produce many more times the milk than they would naturally. Hooked to electronic milking machines by their udders, the cows suffer electronic shocks, painful lesions and mastitis – a condition which can increase the amount of pus, for which the cows are given antibiotics. And where do you think these hormones, antibiotics, and pus subsequently end up? Yes — in that thick glass of milk.

So how do you get your calcium fill without consuming milk and dairy products? From the same place cows do! Yes, dark leafy greens – the vegetables mom used to make us eat: collard greens, broccoli, bok choy, and kale are all excellent sources of calcium. Sea vegetables, sesame seeds, tahini, chia, and figs are also high quality, calcium-rich foods.

Non-dairy “milk” alternatives such as soy, rice, hemp, coconut, oat and almond milks are a great way of providing the body with wholesome nutrition. Although they are much healthier options to dairy, keep in mind that they are still processed with additives, and create acid in the body. Remember, fresh is always best!

At our home, we prepare a large jug of (nut) mylk, and keep it in the fridge to add to smoothies or cereal. Nut and seed mylks are surprisingly easy to make. They are loaded with good-for-you nutrition without the cholesterol, hormones, fat, and mucus. Plus, they’re delicious too! Try the following recipe and leave the milk for the calves!

INSTANT HEMP MYLK (makes 2-3 servings)

* 4 cups water
* 1 cup hemp seed
* a few dates, or maple syrup (or a few drops of stevia)
* 1 TBSP alcohol-free vanilla extract
* Blend all of the ingredients until creamy and smooth. Refrigerate.

Natasha Kyssa is the author of The SimplyRaw Living Foods Detox Manual, as well as the founder of SimplyRaw. She has been living a raw vegan lifestyle for 20 years. www.simplyraw.ca

Another Awesome NCVA Potluck!

By Erin

Thanks to everyone who came out to tonight’s potluck and cookie exchange.

We got off to a bit of a slow start. The potluck officially began at 6:30, but by that time there were only about 10 people there. More slowly trickled in, however, and by 7 or so, I’d say we had a good 40 people.

Highlights of the evening? Hmmm….I got to try vegan mac and cheese for the first time. Well, the homemade stuff anyway. I made a boxed version once and Neil was so traumatized with revulsion that I’ve never attempted to make it again. Neil, of course, wouldn’t try it – even when I told him that Salad in a Steakhouse had made it (sorry, David, I started calling you that and now I can’t stop).

Neil’s faux steak and stout pie, of course, was a big hit. It’s even better now he’s making it with the Nelakee mushroom beef instead of the rather gelatinous PC fake beef strips.

Oh, and of course Pamela’s awesome curry was, well, awesome. It earned more than one delighted exclamation of “fake shrimp!”

There was a dramatic late run on the buffet table when it was discovered that late arrival Harpreet had clandestinely added some homemade potato pancakes to the buffet table. A big shout out to Harpreet for bringing something so awesome on her first time out, by the way!

On the weird side, the dessert table this time out was filled entirely with apples. Seriously, there were something like five separate bags of apples, and no other desserts.

Weird!

Well, there was also a bag of oranges and a couple of things that straddled the line between sweet dessert and savoury side dish, but mostly it was apples. Very weird how that can happen sometimes. At the September potluck, for example, it was all desserts. There were maybe two savoury dishes and the rest was cakes, cookies, pies…

That was pretty great actually.

Of course, it was quite providential that the dessert pickings were slim, since today was the day of the cookie exchange. We sold quite a few 6-cookie bags to our dessert deprived attendees.

Cookie Exchange

Who made that fabulous shortbread, by the way – these little squares with the fork holes?

World’s best shortbread

Because they may well be the most fabulous things I have ever eaten in my life.

Anyway, thanks again all. Hope to see you at the East Africa Meetup!

Some Tried and Tested Ethiopian Wat Recipes

As promised a few weeks ago here are two recipes I’ve made and really enjoyed. These are best enjoyed with some fresh injera. (Ethiopian bread)

Mesir Wat

Ingredients:
2 onions, chopped
1-2 cloves of garlic, crushed or finely minced
2 tsp ginger, peeled and minced or grated
2-3 tbsp vegetable oil
3 tablespoons berbere
2 cups red lentils, rinsed
4 cups, water or broth
salt & pepper, to taste

Directions
Place the onion, garlic and ginger in a food processor or blender and puree. Add a little water if necessary.

Heat the oil in a large, heavy-bottomed saucepan over medium flame. Add berbere and stir rapidly to color the oil and cook spices through, about 30 seconds.

Add the onion puree and sauté until the excess moisture evaporates and the onion loses its raw aroma, about 5-10 minutes. Do not burn.

Add lentils and water to the saucepan. Bring to a boil, reduce heat to low, and simmer, uncovered, until lentils are cooked through and fall apart, about 30 to 40 minutes. Add water if necessary to keep the lentils from drying out.

Stir in salt and pepper to taste and serve.
Kik Alicha

Ingredients
3 cups water plus 2 tablespoons (divided)
1 cup dried yellow split peas
2 tablespoons olive oil
1/2 small onion, chopped
2 cloves garlic, minced
1 1 inch-long piece fresh ginger, peeled,
finely chopped 1/2 teaspoon ground turmeric
1 teaspoon salt

Directions
Place 3 cups of the water and the peas in large saucepan. Heat over high heat to boiling. Reduce heat to medium; cook until almost tender, about 40 minutes.

Heat olive oil in a medium skillet over medium-high heat; cook onion until translucent, about 5 minutes. Add garlic, ginger and turmeric; cook 1 minute.

Add remaining 2 tablespoons water; cover. Cook on low heat 3 minutes. Add mixture to cooked peas; stir in salt. Simmer until peas are very soft, about 30 minutes. Taste; adjust seasonings.

Tales of Cake and Frosting

By Erin

I’m not sure how many of you know this, but the NCVA is developing a restaurant outreach program whereby we try to encourage and teach local omni restaurants to be more vegan friendly.

As part of our restaurant outreach package, I wanted to include a really easy and delicious dessert recipe since, even at the veg-friendliest restaurants, vegan desserts are rare.

I settled on chocolate cake since there are so many great vegan ones out there. Specifically, I opted for one of the recipes that helped Chloe Coscarelli win on the Food Networks “Cupcake Wars.”

Check out an article on her win at http://well.blogs.nytimes.com/2010/09/06/tasty-vegan-food-cupcakes-show-it-can-be-done/.

She was also interviewed recently on “Animal Voices” a Toronto-based radio show. Check that out at: http://animalvoices.ca/2010/10/05/vegan-fitness-nutrition-ultramarathoner-brendan-brazier-dr-occhipinti-chef-chloe-coscarelli/

Anyway, I’d already tweaked the recipe a bit…a little less sugar, instant coffee because I never have espresso powder…but now I wanted to do a test run with the recipe as a two-layer cake. No big changes required, just needed to find the right baking time. Looking at other layer cake recipes, 350 for somewhere between 28 and 36 minutes seemed the norm.

I figured since this was an experimental cake, I’d run another experiment while verifying the bake time. Have you ever noticed how adamant vegan bakers are about not overmixing cake batter? Apparently it leads to tough cakes, fallen cakes, cakes that don’t rise at all, and various other types of badness.

But if that’s the case, why do all boxed cake mix instructions tell you to beat the hell out of their batter for two minutes?

I don’t get it.

So I decided to put it to the test. Layer number one was “mixed lightly until just incorporated” while layer number two was beaten violently à la a boxed mix.

I baked layer number one for 33 minutes. It fell a little bit, making me think I should do layer number two for 35 minutes. Which I did, and, when it came out of the oven, I honestly thought that it was the winner. It was big and poofy and had a smooth, glossy surface. I envisioned myself calling out all the know-it-all vegan chefs and telling them to stick their light incorporation and accept that fact that, evil omni or not, Duncan Hines has been doing cakes since they were in short pants so if he says beat, dammit, beat!

But then layer number two deflated. Here’s a shot of the two layers side by side. The one on the left is the beaten one. Quite the difference in looks!

Now on to the icing.

I recently found a recipe for great fluffy vegan icing. Turns out the secret is a pound of fat. Ever notice how often the secret ingredient is a pound of fat?

That recipe is below:

4 cups confectioners’ sugar (Wholesome Sweeteners does one using unrefined sugar, for a mere thousand dollars a bag)
½ cup Earth Balance buttery spread
Pinch salt
1 tsp vanilla extract

Beat until fluffy (about 5-7 minutes). For a chocolate version, add ½ cup of cocoa.

I was planning to go with that recipe. But then I discovered Mimicreme Healthy Top whipped topping. While this stuff is healthy only in comparison to sucking on the tailpipe of an idling car, it is very delicious. Plus, it boasts a level of fluffiness that simply cannot be achieved using traditional ingredients.

So I decided to try mixing some sugar, coffee and cocoa into the Mimicreme to create a fluffy mocha icing.

I began by pulverizing some sugar and instant coffee in my partner’s coffee grinder (I’m sure he didn’t mind), then tossed that and a few tablespoons of cocoa into the unmixed Mimicreme. The stuff looks terrifying just out of the box, by the way. Remember when Tyler Durden retrieved the bag of fat from the liposuction clinic dumpster? Like that, only square.

Then I whipped and beheld the miracle that I had created.

The stuff was yummy, but seriously weird. First, even though I’d added a good half cup of dry ingredients to the cream, it was runnier than the stuff I’d made on a previous occasion with no additives. How does that work?

Second, it was neither liquid not solid. I actually put it in the fridge before putting it on the cake, hoping it would firm up a bit. When it hadn’t changed much after half an hour, I decided to go ahead. I dumped it all on top of the cake, then began spreading it carefully over the edges. I fully expected it to pour over, making unappealing puddles around the base of the cake.

But it didn’t. The semi-liquid cream sort of clung to the sides of the cake. I was amazed! Then I decided to tempt fate by trying to smooth out the clinging cream. No way was I getting away with this, I thought. It’ll peel away from the sides of the cake, or start running down, or something.

Nope. It was amazingly malleable. I spread, I swirled, I smoothed, and the modified Mimicreme just sort of went with it. It was kind of like the bowling ball mattress – touching any given bit of icing only moved that bit – the stuff around it stayed put.

Very weird.

Anyway, here are a couple of pics of the finished cake, with and without espresso chocolate shavings. I’ve got a couple of taste testers coming by later to see if hey can tell the difference between layers one and two.

Oh, and here is the final cake recipe:

3 cups flour
1.5 cups sugar
1 cup cocoa powder
2 tsp baking soda
1.5 tsp salt
2 cups coconut milk
1 cup vegetable oil
4 tbsp vinegar
4 tsp vanilla extract
2 tbsp instant coffee

Preheat oven to 350
Line the bottoms of 2 8-inch round cake pans with parchment paper

Mix wet ingredients
Mix dry ingredients
Add wet ingredients to dry ingredients and “mix lightly until just incorporated”

Divide batter between cake pans and spread it around (it’s a thick batter)

Bake for 32-35 minutes.

The additions to the Mimicreme were 1/2 cup sugar, 1 tsp instant coffee and 4 tbsp cocoa.